Creating a successful affiliate marketing website involves several key steps. One of those steps is choosing the right platform to build your affiliate website. WordPress is, by far, the most popular choice for affiliate marketers. It is flexible, has a large community, and can be extended with thousands of plugins and themes. This guide will walk you through the technical steps to set up an affiliate website in WordPress.
In this guide, we assume you have already chosen a web hosting provider. If this is not the case, please read our article on How to Select a Good Hosting Provider for Your Affiliate Website first. Also, our more general article on How to Start an Affiliate Website might be a good read.
Step-by-Step Guide on Creating an Affiliate Website in WordPress
Step 1: Install WordPress
Requirements for Installing WordPress
After you’ve chosen a domain name and hosting provider, it is time to install WordPress. Before you begin, ensure your hosting provider meets the following requirements:
- PHP version 7.4 or greater
- MySQL version 5.6 or greater OR MariaDB version 10.1 or greater
- HTTPS support
Step-by-Step Guide to Installing WordPress
Most hosting providers we recommend in our article have an one-click installer for WordPress. This simplifies the installation to just a few(?!) clicks. If the one-click installation is not available, you can install WordPress using the manual method.
Method 1: Using your Hosting Provider’s One-Click Installer
If your hosting provider provides a one-click installer, you can follow these steps to use the installer.
- Log in to Your Hosting Account
- Access your hosting account’s control panel (cPanel, Plesk.).
- Locate the One-Click installer
- Find the WordPress installer. Common names include Softaculous, Fantastico, or WordPress Manager.
- Run the Installer
- Click on the WordPress icon and follow the on-screen instructions.
- Choose the domain where you want to install WordPress.
- Fill in the necessary details such as site name, admin username, password, and email.
- Click
Install.
Method 2: Manual Installation
If your hosting provider does not offer a one-click installer, or if you prefer a hands-on approach, you can follow these steps to install WordPress manually:
- Download WordPress
- Go to WordPress.org and download the latest version of WordPress.
- Create a Database and User
- Log in to your hosting account’s control panel (cPanel, Plesk).
- Navigate to the MySQL Databases section.
- Create a new database and new user.
- Assign the user to the database, and grant all privileges.
- Upload WordPress Files
- Use an FTP client (like FileZilla) or the File Manager in your hosting cPanel to upload the WordPress files to your server.
- Extract the WordPress zip file into the root directory (usually public_html).
- Run the Installation Script
- Open your web browser and go to your domain name (e.g., www.yourdomain.com).
- Follow the on-screen instructions to complete the WordPress installation.
- Enter your database details and set up your website title, username, and password.
Step 2: Choose and Install a WordPress Theme
Once you’ve installed WordPress, you probably want to either replace or edit the default theme. A WordPress theme determines the look and feel of your website, impacting both its aesthetics and functionality. Typically, a theme contains a header, footer, and an optional sidebar. WordPress offers a wide range of free and premium themes to choose from. This is both a blessing and a curse, since the choice can be overwhelming. If so, keep in mind that you can always switch themes at a later stage.
Types of WordPress Themes
One of the most important choices when selecting a theme for your website, is whether you want to go for a classic theme or a block-enabled theme.
Classic Themes
Classic themes are created by developers and often come in both a free and premium version. These themes contain a set of customization options defined by the developer. This makes them user friendly and straightforward to use (if developed right). Therefore, they are ideal for beginners who prefer a ready-made layout rather than the ability to customize the theme extensively.
Block-Enabled Themes
Block-enabled themes, also, known as block themes, are a newer type of theme. The default theme of WordPress is a block-enabled theme. They are designed to work with the WordPress block editor (Gutenberg), meaning you can edit it in a similar way as you would edit a page or post. This offers great flexibility, allowing you to customize every part of the theme. However, block themes can be more complex to configure, especially for beginners.
Installing a WordPress Theme
You can either install a theme from the WordPress repository or manually. If the theme is available in the repository that is the easiest way to go. However, there are many themes that are not listed in the repository. Those need to be installed manually.

Installing a Theme from the WordPress Repository
- Log in to Your WordPress Dashboard and go to the Themes Page
- Navigate to
Appearance>Themes.
- Navigate to
- Add a New Theme
- Click
Add Newand browse or search for themes in the WordPress repository.
- Click
- Install and Activate
- Click
Installand thenActivateonce the theme is installed.
- Click
Uploading a Theme Manually
- Download the Theme
- Download a theme from a theme marketplace or other source.
- Log in to Your WordPress Dashboard And go to the Upload Themes Page
- Navigate to
Appearance>Themes - Click
Add New Themeand after thatUpload Theme.
- Navigate to
- Upload and Install
- Click
Choose File, select your theme’s zip file, and clickInstall Now. - Click
Activateonce the theme is installed.
- Click
Configuring Your WordPress Theme
Once you’ve installed your theme, you need to configure it to suit your needs. You will probably want to add your logo, change colors, etc. Depending on whether you have a classic or a block theme, this is done through the Theme Customizer or Theme Editor respectively. The customizer can be found by navigating to Appearance > Customize, and the editor by navigating to Appearance > Editor.
Recommended Themes for Affiliate Marketing
Popular Free Themes
- Astra: Lightweight, fast, and highly customizable.
- OceanWP: Versatile with many free extensions.
- Hestia: Modern design and easy to configure.
Popular Premium Themes
- Divi: Powerful builder with extensive options.
- Avada: Versatile, with a large community and excellent support.
- GeneratePress: Lightweight and highly customizable.
Step 3: Install Essential WordPress Plugins
WordPress plugins add functionality to your website, such as contact forms, social sharing, SEO optimization, and security. Certain plugins are essential to help you create an affiliate website in WordPress.
List of Essential Plugins for an Affiliate Website
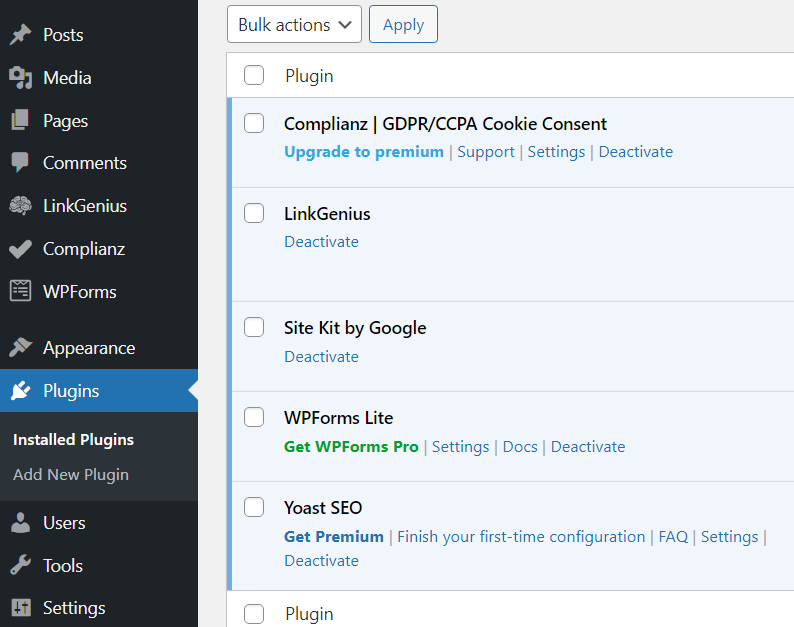
- SEO Plugins: An SEO plugin like RankMath or Yoast SEO allows you to handle on-page SEO, such as setting titles, meta descriptions, and creating optimized sitemaps.
- Affiliate Link Management: A plugin like LinkGenius allows you to manage your affiliate links in one place. They allow you to tag and categorize links, place the links in content, disclose affiliate links, and more.
- Regulations: A plugin like Complianz can help you ask for cookie consent, block cookies and create the necessary documents to make your website comply to local regulations.
- Analytics: A plugin like Site Kit by Google allows you to view user behavior using Google Analytics, view search queries of your visitors using the Search Console, and view the performance of your website in terms of loading speed.
- Contact: Popular plugins that allow you to create a contact form are WPForms and Contact Form 7.
Installing a Plugin in WordPress
Similar to themes, plugins can be installed via the WordPress repository or manually. The steps are very similar to those of themes.
Installing a Plugin from the WordPress Repository
- Log in to Your WordPress Dashboard and go to the Add Plugins Page
- Navigate to
Plugins>Add New Plugin.
- Navigate to
- Search for the Plugin
- Enter the name of the plugin in the
Search Plugins...field
- Enter the name of the plugin in the
- Install and Activate
- Click
Installand thenActivateonce the theme is installed.
- Click
Installing a Plugin Manually
- Download the Plugin
- Download a plugin from a third party site.
- Log in to Your WordPress Dashboard and go to the Add Plugins Page
- Navigate to
Plugins>Add New Plugin.
- Navigate to
- Upload and Install
- Click
Upload Pluginto go to the page for manual installations. - Click
Choose File, select the plugin zip file, and clickInstall Now. - Click
Activate Pluginonce installed.
- Click
Step 4: Create Pages and Posts
Now that you have installed your theme and essential plugins, you can start creating content for your website. The two main types of content in WordPress are pages and posts.
Difference Between Pages and Posts
Although there might not be a clear difference between pages and posts at first glance, they serve different purposes.
Pages are used for content that is more static and “standalone” and typically not time-sensitive, although there might be exceptions. Pages are organized in a hierarchical structure where a page can be a root page or a child of one other page. This hierarchical structure is typically displayed in the navigation menus of the website. Must-have pages for a website are a Home, About Us, Contact, Disclaimer, and Privacy Policy page. Other pages might include important content specific for the website. For example a companies website may have a “Services” page with subpages like “Consulting” and “Training”.

Posts are used for content that is typically part of a series or a blog, such as articles, news updates, product reviews, or journal entries. Unlike pages, posts do not have a hierarchical structure, but use categories and tags to organize them. Posts are, by default, displayed in reverse chronological order in your, blog, category, or tag pages. If you have a website that reviews products, you will usually publish them as blog posts. This ensures, that users can find products that are similar via the categories and tags. Also, you can keep reviews of old models by just adding a new post for the new models.
A website does not necessarily need blog post, but will always have pages.
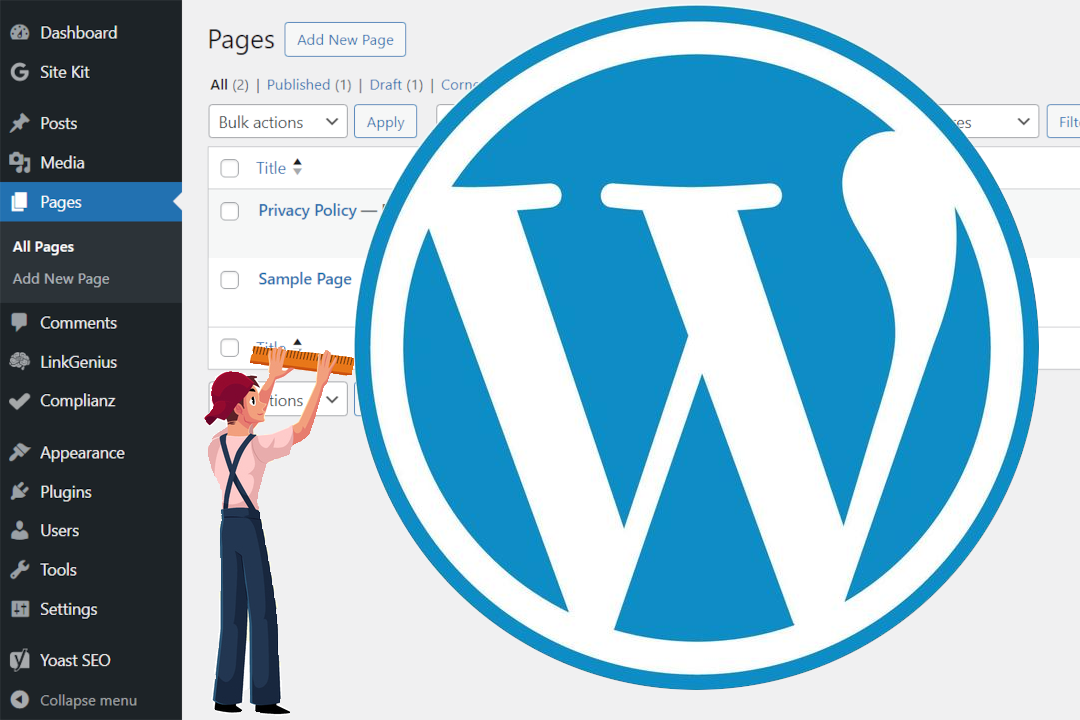
Steps for Creating a Page in WordPress
- Log in to Your WordPress Dashboard.
- Navigate to
Pages>Add New. - Enter a title and content for your page.
- Use the block editor to add text, images, and other media.
- Optionally select a parent page for your page.
- Click
Publishto make the page live.
Steps for Creating a Post in WordPress
- Log in to Your WordPress Dashboard.
- Navigate to
Posts>Add New. - Enter a title and content for your post.
- Use the block editor to add text, images, and other media.
- Assign categories and tags to your post.
- Click
Publishto make the post live.
Step 5: Add Affiliate Links
Actually, once you’ve created your website’s first content, you will typically add the affiliates directly as you create new content. The reason we’ve mentioned this as a subsequent step, is that you usually create some content first to increase your chances of getting accepted into affiliate programs.
Find Affiliate Programs to Promote
This first thing you’ll have to do is to subscribe to affiliate networks and join affiliate programs you want to promote. All-Affiliates.com provides an extensive database of affiliate programs from various networks. Make sure to search for affiliate programs that offer products and services that are relevant to the content of your website. It is perfectly normal to use multiple affiliate networks to get a good set of affiliate programs to promote.
Add Affiliate Links to Your Content
Method 1: Manually Adding Links
The most straightforward way to add affiliate links is by adding them manually to your content. The advantage of this method is that you don’t need an extra plugin to place your links. However, as your content grows it can be harder to keep track of which content contains which affiliate links. That may, in turn, result in dead links when, for example, an affiliate program closes. Below you’ll find the steps of manually adding links:
- Log in to Your WordPress Dashboard.
- Open the editor of the post or page where you want to place an affiliate link.
- Highlight the text where you want to add an affiliate link.
- Click the
Insert/edit linkbutton in the editor toolbar. - Enter the affiliate link URL and click
Apply. Updatethe post or page
Method 2: Using LinkGenius for Managing Affiliate Links
With LinkGenius you can easily keep your affiliate links organized, display them in lists, or replace them when an affiliate link changes or a program closes. Below you find the steps of adding affiliate links using LinkGenius
- Log in to Your WordPress Dashboard.
- Install and activate the LinkGenius Plugin (Needed only once, see steps above on how to install.)
- Navigate to
LinkGenius>Add New - Fill in a
titleand the affiliate link URL at theTarget URL - Click
Publish - Place the link using one of the options below
- Select link in content
- Open the editor of the post or page where you want to place an affiliate link.
- Highlight the text where you want to add an affiliate link.
- Click the
LinkGenius Linkbutton in the editor toolbar. - Search the title and select the links.
- Create a block in content
- Open the editor of the post or page where you want to place an affiliate link.
- Search for LinkGenius at blocks to add a
LinkGenius Link,LinkGenius Category ListorLinkGenius Tag Listblock. - Select the Link, Category or Tag to show.
- Automatic placement (LinkGenius Pro only)
- Scroll down in the screen where you’ve added the link in LinkGenius.
- Fill in the
keywordsyou want LinkGenius to create a link for.
or
Fill inURLsyou want LinkGenius to replace with the affiliate link. - Click
Update, LinkGenius will now automatically place the links for you.
- Select link in content
Step 6: Promote and Extend your Affiliate Website
When you’ve reached this step, you actually already created your affiliate website in WordPress. However, you’re probably not done now. You’ll need to promote your website to attract visitors, keep your content up to date and keep adding new content.
Conclusion
Setting up an affiliate website using WordPress involves several technical steps, but with the right approach, it can be a relatively straightforward process. By following the steps outlined in this guide, you can easily create a professional affiliate marketing website in WordPress. Remember that you’ll continually need to optimize and promote your website to maximize your success.
For a comprehensive guide and tips on how to start your affiliate website download our Affiliate Marketing Checklist for free (no email or other data needed).